User guide
Creating a user
To create a new user.
1. Click the Create button. The Create User dialog appears:
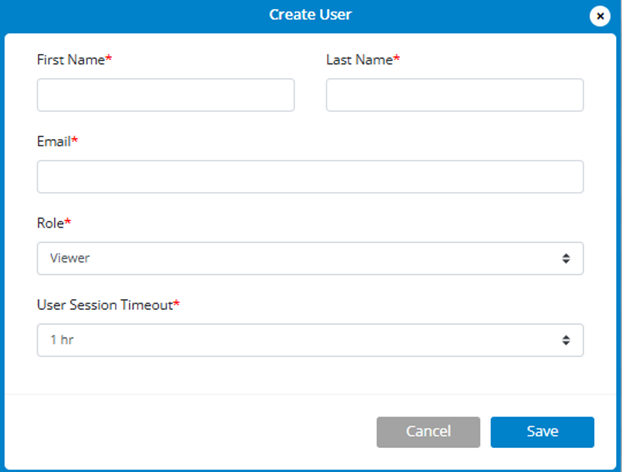
2. Enter the first name of the user.
3. Enter the last name of the user.
4. Enter an Email address for the user.
5. Use the dropdown to select a role for the user:
- Admin: Provides access to all functionality available with Inseego Connect.
- Limited Config: Provides access to view information and the ability to change the Wi-Fi name and password for the primary and guest network.
- Manager: Provides ability to manage devices (except to remove), but not the ability to manage users. Can view subtenants but not create them.
- Viewer: Provides access to view information, but not the ability to make changes.
6. Use the dropdown to select the amount of time before session timeout occurs for this user.
7. Select Save. The user appears in the list.
NOTE: To edit user information, click on a user name in the list.


