Installation guide
Step two: secure the J-arm mount
The J-arm mount is adjustable and can be mounted on vertical, horizontal, and slanted exterior surfaces.
The mount is attached using the four-roof mount lag screw in the corners of the base.
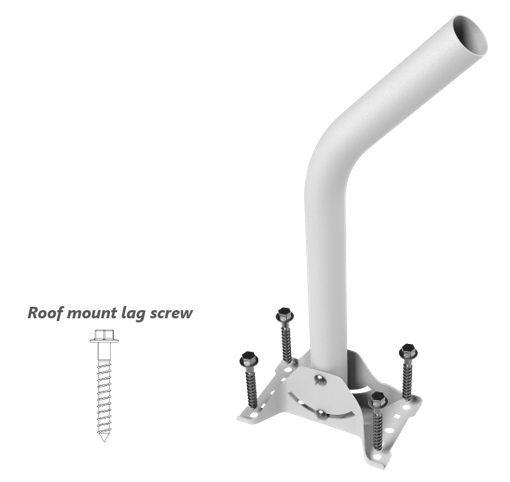
- Pre-drill holes in the surveyed location.
- Attach the mount using a hex driver to tighten the lag screws. (Concrete anchors are provided for mounting to concrete or brick.)
NOTE: Using a longer J-arm to extend the FW3000 higher may require struts attached to the J-arm to increase stability. You may need to use longer lag screws for the mount and ensure it is attached to a structural element such a wall stud.


