Mesh nodes expand your network coverage and make it more reliable by adding extra paths for data to travel. This provides backups to data flow, creating a stronger, more dependable network that can cover larger areas.
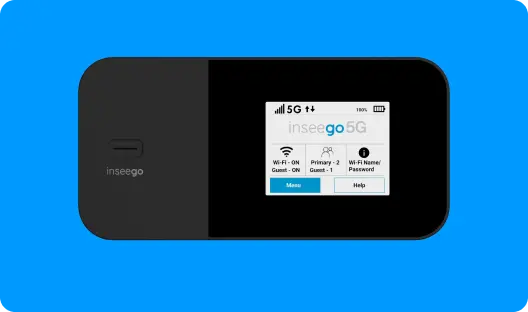
Your FX4100 cellular router is compatible with the Inseego Wavemaker mesh Wi-Fi X700. See Using mesh Wi-Fi X700 for more information.
To pair an X700 mesh node to your FX4100 cellular router:
1. Power on the FX4100.
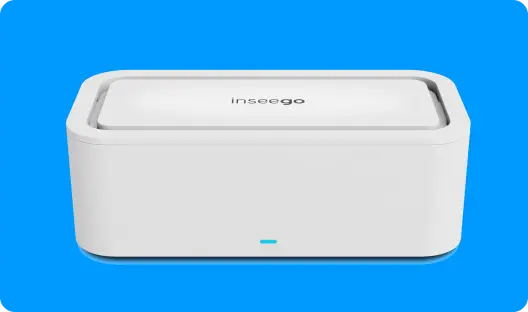
2. Power on the X700 by plugging the USB-C cable into the USB power port. Plug the other end into any of the following: - AC adapter (provided) - USB-powered hub - USB host device
When the X700 LED is blinking green, it is ready to pair.
3. Pair the X700. You can pair your X700 with an Inseego FX4100 cellular router using Wi-Fi or Ethernet.
Pairing with Wi-Fi
To initiate Wi-Fi pairing, use the Admin web UI or the interactive device display on the FX4100.
Using the FX4100 device display
1. Press the device display button repeatedly until you see Wi-Fi Mesh: Hold button to add.
2. Press and hold the device display button.
3. When prompted by the display, press the Mesh button on the X700.
The LED on the X700 and the router blink blue while pairing. When the LEDs are solid, pairing is complete.
Using the Admin web UI:
1. Go to http://192.168.1.1 to access the Admin web UI for the FX4100. Navigate to Wi-Fi > Mesh.
2. Press the Mesh button on the X700.
3. Within 30 seconds, click Add Node on the UI Mesh page.
The LED on the X700 and the router blink blue while pairing. When the LEDs are solid, pairing is complete.
Pairing with Ethernet
1. Connect an Ethernet cable from the X700 to the FX4100.
2. Pairing is automatic. The LED on the X700 blinks blue while pairing. When pairing is complete the LED is solid.
When you disconnect the Ethernet cable, the X700 remains paired via Wi-Fi.